Having a flat tire is part of riding a bike, but as much as it’s part of the activity, a flat tire can ruin your ride in record time. Thankfully, there are a few ways to prevent flats, one of which is using sealant. Let’s find out whether putting sealant in your inner tube will help you prevent flats and help you ride worry-free.
You can put tire sealant in bike inner tubes to fix or prevent punctures on the tread area smaller than 3mm, but it will not prevent pinch flats or punctures bigger than 3mm. For best results, use tube-specific sealant. The sealant will plug small holes and prevent them from becoming large punctures.
There are some punctures that the sealant can’t handle, specifically those on the side of the tube and those on the tread area that exceed 3 mm in size. The main convenience of having a tubed tire with sealant is that of not having to stop for every single small puncture, but only for nasty large ones.
Small punctures will be fixed without the need for patching the tube. You won’t even notice that you had a leaking tire. Long gashes caused by some pinch flats are too big for the sealant to handle.
Electric bikes built for everything and priced for everyone. Shop Rad Power Bikes, America's #1 electric bike brand. Get out. Go further. Ride Rad.
Slime is easy to apply and it automatically fixes punctures on the tread area smaller than 3 mm. You know that it does its job when you don't notice it's there.

Sealant In Inner Tube vs Tubeless Setup (Pros and Cons)
Sealant can be used both in a tubeless setup and with inner tubes as well. Both applications have their advantages and disadvantages. Let’s compare what these are.
Sealant In Inner Tube
Pros:
- Minimal upfront cost. Both Slime and Muc Off make excellent quality sealants, and a small bottle is comparable to the price of a new inner tube.
- You can use your favorite tire. Since there’s no need for a tubeless specific rim and tire, you can use your existing tire and put sealant in the inner tube.
- Less maintenance. Tube-specific sealant lasts longer than tubeless sealant.
Cons:
- Less protection. The inner tube is the weakest link in the chain (tire, tube and sealant), as it’s quite vulnerable and some punctures can’t be handled by the sealant as they are too big.
- Things can sometimes get messy. If you are ever in a situation where you need to repair the tire tube or the tire tread, you will likely end up getting your hands pretty dirty with all the sealant.
Sealant In A Tubeless Setup
Pros:
- Fewer potential punctures. With no inner tube inside the tire you eliminate one type of puncture that even sealants can’t handle: pinch flats. These are a complete non-issue with tubeless tires.
- More comfort. As you don’t need to be worried about pinch flats, you can run your tires at lower pressures, which enhances your riding comfort and your grip because it increases your tire’s footprint.
Cons:

- Initial setup cost. To be able to run a tubeless setup with sealant you need tubeless ready rims, tires and valves as well as sealant. Alternatively, you need to purchase a tubeless conversion kit, which is around 70 dollars.
- More regular maintenance. The sealant in a tubeless tire sets faster than in the inner tube. You need to check it and top it up every few months to make sure that it remains liquid. If you have dry tire sealant in there, this will not prevent you from getting punctures.
What Types of Tubes Can You Put Sealant In?
As long as you can get the sealant in the tube you can use any tire.
Tires with Schrader valves all have removable cores, so putting sealant in them is very simple. All you need is a core remover, which is built into some sealants.
Some Presta valves come with removable cores and can be topped up very easily. To see if yours is removable check if the top part of your valve stem is fused with the body. If it has flat sides and it rotates freely, your valve core is removable. In this case, you need to remove the valve core, top up your tire and put the core back.
These are the steps to add sealant to your tire:

- Remove the valve core as described above.
- Attach the hose to the valve stem and inject the sealant into the tire. The amount you should inject depends on the sealant and the tire size. Find the recommended amount printed on the bottle.
- Reinstall the valve core.
- Pump up the tire to the recommended pressure.
- Spin your wheel so the sealant distributes evenly inside the tube.
If you have Presta valve with a non-removable valve core, you can still hack your valve so you can top it up with some flat-proof liquid.
Fully open the nut on the top of the stem. Grab it gently with pliers and continue twisting in the opening direction. As the nut comes off the thread will fall into the tire. You need to grab this with your fingers through the inner tube and make sure it doesn’t move around. After you’ve topped up your tire, you need to get the screw back out again and place the nut on top of it.
What Types of Holes Does The Sealant Patch?
Sealants can fix flats that occur from small sharp objects piercing through the tire’s running surface that don’t exceed 3-4 mm in size. It will deal with goat heads, thumb tacks, nails and thorns without problems.
It’s important to remember that inner tubes with sealant are not invincible; it will not fix large punctures (4+mm in size) and punctures on the side of the tube that most commonly come from pinch flats.
To prevent pinch flats from occurring, you need to run your tires at sufficiently high pressures, and if the road conditions are really hostile, you should consider using wider tires if possible. With a greater surface area, these tires are less likely to be impacted by sharp stones and potholes.
How Long Does The Sealant Last In The Tube?
High quality inner tube sealant is relatively maintenance free. Slime guarantees up to 2 years inside the tube, while Muc Off promises that the sealant will last the lifetime of the inner tube and it does not need to be toped up. In contrast with tubeless sealant, which needs to be topped up every 2-6 months.
Some factors, such as how often you ride your bike and where you store it and how many punctures it needs to fix may come into play in determining the lifetime of the sealant.
The temperature and the overall humidity of the area you’re based in could also play a role in how long the sealant will last in the tube. Ideally, if you have applied sealant to the inner tubes, the best place to store your bike is a relatively cool place.
Inevitably, if the sealant has been hard at work sealing punctures you never knew you had, it may get used up quicker.
How To Get The Most Out Of Your Sealant
Nothing is completely failure-proof, and your sealant is not like a wild card that gets you out of every bad situation.
In order to maximize the use of your sealant, here are some practical tips to consider.
- Use a tire with puncture protection. Although the sealant is designed to fix slow punctures, you should strive to minimize the chances of getting a puncture in the first place.
- Run your tires at higher pressure. Since sealants are not meant to deal with snake bites, you should pay special attention to running your tires at sufficiently high pressures. Low pressure increases your chances of getting pinch flats and punctures outside the tread area of the tire.
- Don’t take chances. Just because you have puncture resistant tires and sealant in your inner tubes it doesn’t mean that you will get no flats. If you see thorns or sharp objects you should still avoid running over them.
In any ca carry a backup tube and a minipump just in case you get a flat your sealant can’t fix. This will give you the peace of mind that even if everything goes pear-shaped you have a plan.
Can You Use Tubeless Sealant For Your Inner Tube
Although you can use tubeless sealant in your inner tube, tube specific sealants are designed for your tube and they are going to last longer and do a better job at sealing punctures on your tubes. The best sealants made specifically for inner tubes are made by Slime and Muc Off.
I have personal experience with Slime, but I’ve also read and seen good things about Muc Off.
- Slime Tube Repair Sealant (Available on Amazon)
- Muc Off Inner Tube Sealant (Available on Amazon)
Self Sealing Inner Tubes
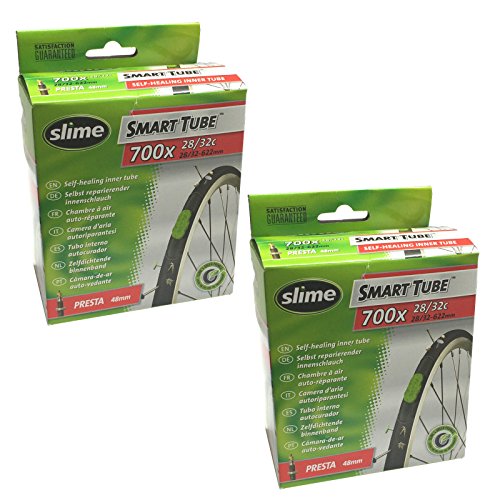
If you want the benefits of a tube with sealant but you want to avoid filling it up yourself, you can purchase Slime Smart Tubes (available on Amazon), which are tubes already pre-filled with Slime. These tubes last 2 years and will patch up the same type of punctures as tubes filled with Slime from the bottle.
This tube is pre-filled with Slime so you don't need to worry about having the tools and time to puncture-proof your tube. It's ready to be placed in your tire and you're ready to roll.
Conclusion
As the saying goes: Fail to prepare, prepare to fail. With great
Happy pedaling!