If you want your bike’s drivetrain to last, it’s important to perform preventative maintenance on your chain. Keeping your chain clean and lubricated will protect your cogs and derailleur from damage while checking your chain’s tension every once in a while and replacing it when it loosens too much will preserve your cogs and make riding more fun and safe.
Five essential tools to keep your chain clean, lubricated, properly tight, and well-maintained are:
- Chain Cleaner
- Chain Cleaning Tool
- Chain Lubricant
- Chain Breaker
- Chain Wear Indicator (tool)
We’ll talk about what they do, when you should use them, and why it’s so important to have a dedicated tool for the job.
1. Chain Cleaner
As you ride your bike, you’ll kick up a steady supply of dirt and grime in the general direction of your chain. Most of this misses or falls off harmlessly, but some of the dirt particles will find a new home.
Electric bikes built for everything and priced for everyone. Shop Rad Power Bikes, America's #1 electric bike brand. Get out. Go further. Ride Rad.
Some of the dirt will even mix with your chain lubricant, forming an especially nasty mixture that will quickly wear out your bike’s components. This layer of grime can be quite difficult to remove, even with the proper tools.
Bike chain cleaners are formulated to cut through this grimy sludge with ease. It’s specifically designed to keep your chain safe while containing powerful solvents that will dissolve the accumulated grit and leave your chain clean and spotless.
Chain cleaner might seem pretty pricey to clean a chain once, but most cleaners come with more than enough solvent for several cleaning cycles. Additionally, when you combine a liquid solvent with a chain cleaning tool, you’ll be able to drain and filter your solvent and reuse it many times.
So when should you clean your chain? If your bike’s chain is making noise, it’s a good idea to re-lube it.
As for cleaning, before you lubricate your chain, take a look at its condition. If it looks dirty or it feels grimy to the touch, you’ll definitely want to clean it. Beyond that, you’ll need to use your judgment. In general, the more you ride, the more often you’ll want to clean your chain.

2. Chain Cleaning Tool

While a good chain cleaner will loosen up the gunk accumulated on your chain, it’s still important to add some mechanical action to get all the dirt off.
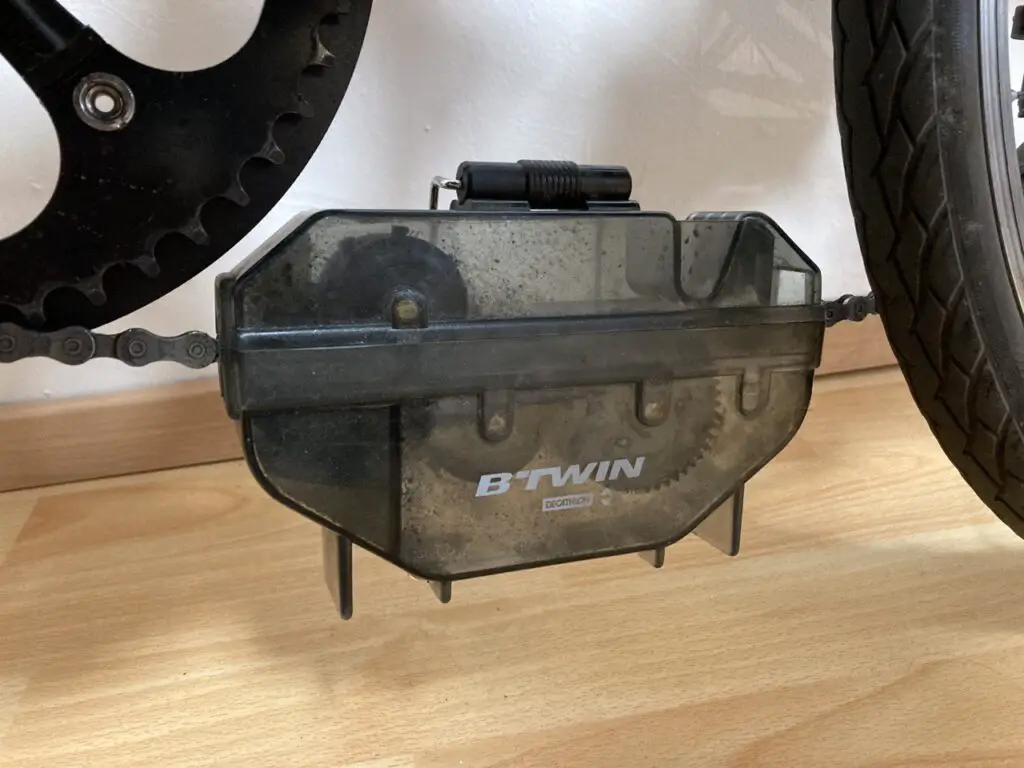
Going over the chain with a rag will help, but your rag will be difficult to fit through the small gaps in the chain to clean out the inside. A chain cleaning tool is a specialized tub that has rollers, brushes, and a sealed body that will clean all of the nooks and crannies in your chain with ease.
You can fill it with chain cleaner, run your chain through the middle, and simply crank the pedals on your bike to run the chain across a series of brushes and rollers. Not only will the brushes scrub your chain clean of dirt, but the sealed body can let you save your chain cleaner so you can reuse it later.
3. Chain Lubricant
Cleaning your chain is a great way to remove grit and dirt that would otherwise erode metal surfaces that come into contact with your bike’s chain. Once it’s clean, however, it’s incredibly important to use a dedicated chain lubricant to re-lube your chain.

Without this step, your chain will grind itself down and wear out your cogs very quickly, causing a lot of expensive damage.
A number of bikers on the internet swear by some unconventional chain lubes, including WD-40 and other cheap general-purpose lubricants. Don’t follow their advice without doing your own research.
Bike chain lube does two things: it helps to reduce friction as the links of your chain move against each other and rub against metal parts, and it also has to fight against dirt and grime as it works.
In the fast-moving environment of your bike chain, most household lubricants (like WD-40, which is technically a degreaser and not a lubricant) fail utterly at one or both of these tasks. Dedicated bike chain lubes, however, usually do both things very, very well.
While you should definitely buy a high-quality
Just like with solvents, you’ll be able to lubricant many chains with a single bottle.
4. Chain Breaker

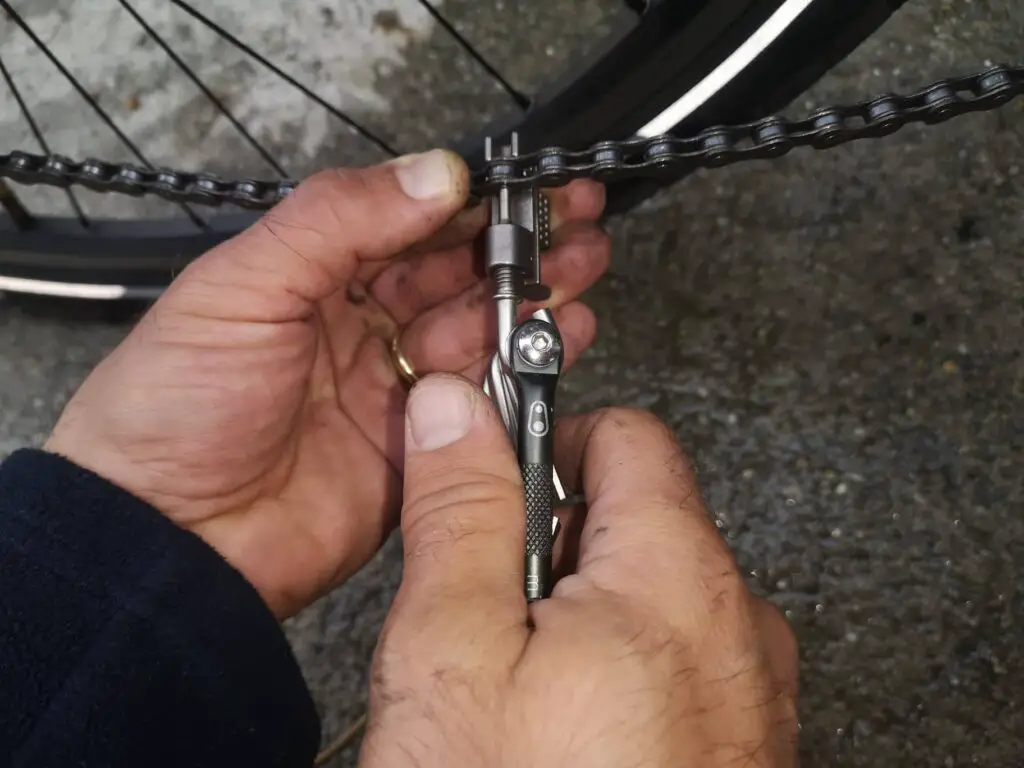
With a chain breaker tool, removing a chain from your bike is a simple and easy process. Without the tool, it’s a nightmare. Even simple master link chains require lots of finagling with pliers in order to hit the correct spots and pop the chain open.
Connecting rivet chains, on the other hand, are ridiculously difficult. You’ll need to carefully hammer a small, pointed object into a rivet on your chain while keeping the chain itself still. This requires a lot of dexterity, some strength, and ideally more than two hands.
A chain breaker automates most of the hard parts of this process. The tool holds the chain in place and allows you to screw a carefully designed bit into place, popping out the rivet with ease. This means that you can easily remove your chain yourself without needing to jump through a bunch of hoops.
You can also use the tool to insert a connecting rivet when it’s time to reassemble your chain. Good chain breaker tools also come with other attachments, enabling you to join chains from brands that need special steps.
Replacing your chain is not something you’ll need to do every day, but if you ride a lot, you might need to do it several times a year. Without a chain breaker tool, it’s probably a good idea to pay someone at a bike shop to replace your chain.
Buying a chain breaker will turn this into a task that you can do quickly in your garage.
5. Chain Wear Indicator (tool)

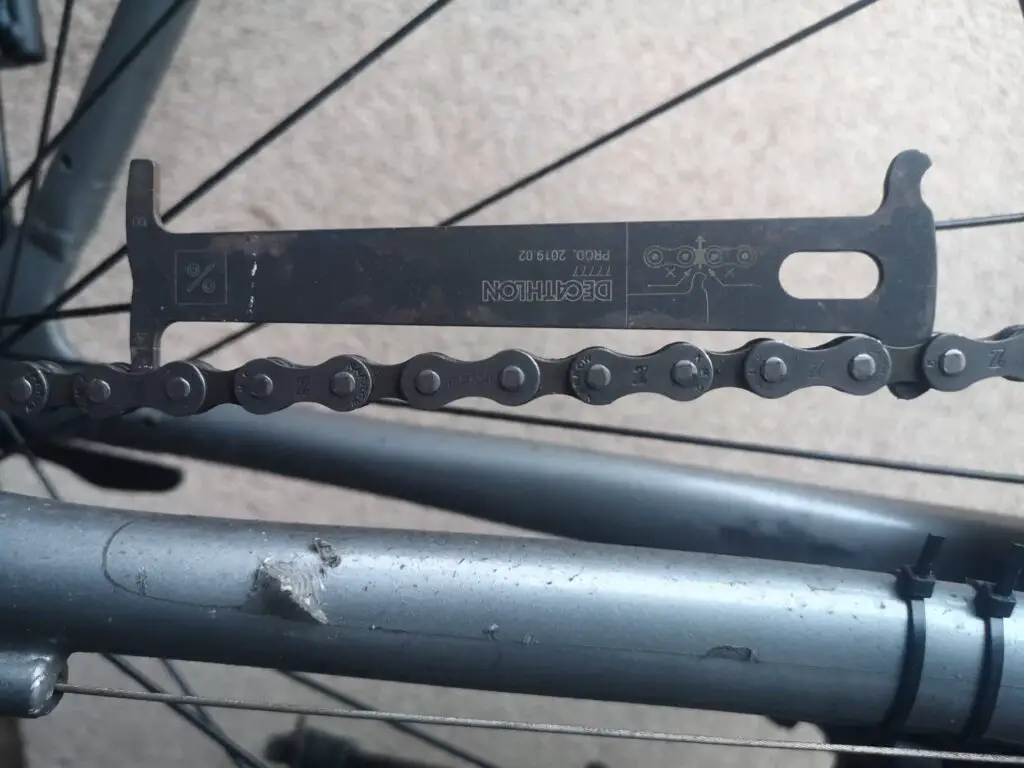
Bike chains are made of interlocking metal parts. As these parts wear down, the chain will naturally stretch out. A bike chain wear indicator is a special tool that makes it easy to consistently measure the length of your chain, letting you make an accurate determination of when it’s time to replace your chain.
Bike chain wear indicators tend to be very simple. They’re carefully sized metal parts that slot into your chain, letting you see how tight the fit is. Some chain wear indicators have moving parts that will reveal how stretched your chain is, while others will require you to simply compare your chain to one or two fixed lengths.
In either case, you can use the tool to get a very accurate measure of how stretched your chain is. Anything over 0.5% stretch can be a cause for concern, especially with a complicated drivetrain.
While you can technically measure your chain with a ruler, professional bike mechanics almost always measure with a chain tool. This is because chains are three-dimensional objects that stretch and bend.
By hooking into your chain, a chain tool will keep your chain under tension while you measure. This helps to negate these issues and deliver an accurate measurement every time. It’ll also ensure that you measure from a good starting and ending point, protecting you from drawing an inaccurate conclusion.
So when should you use a chain wear indicator?
If your chain looks loose, try to lift it off of your drivetrain while you’re in the biggest cog in the front and the smallest cog in the back. If you can get your chain significantly off of your front cog, it’s a good idea to check the stretch. If you’ve got an old chain, however, you might be able to skip the step where you check your chain and just replace your chain immediately.
