A loose bike chain can cause poor shifting, skipping, dropping, or accelerated drivetrain wear. Luckily it is usually an easy fix! To find out whether your chain is too long, look at it from the side, with your eyes level with the chain.
If you look at a loose chain from sideways, it will sag close to or below the chain as it hangs between the rear cogs and chainring. The chain might skip as you pedal or even drop off the gears. On derailleur-equipped drivetrains, the drivetrain might shift poorly as well.
How Tight Should My Bike Chain Be?
On a bike without a derailleur, you should be able to lift the chain about 1/2 inch above its resting position at the middle of the chainstay. If the chain is too tight, you can’t lift the chain as described above, and you might feel and hear binding in the drivetrain as you pedal. If the chain is too loose, it skips and often drops, and you can see it sag.
On bikes with derailleurs, a loose chain will sag when the drivetrain is in the “small-small” gear combination, and a tight chain will not be able to shift into the “big-big” gear combination (even though these are not considered usable gear combinations for riding). A properly sized chain can shift into both gear combinations without sagging or getting stuck.
Electric bikes built for everything and priced for everyone. Shop Rad Power Bikes, America's #1 electric bike brand. Get out. Go further. Ride Rad.
Is A Loose Bike Chain Bad For Your Bike?
A loose chain can cause accelerated wear of your drivetrain components, leading to premature cassette, freewheel, cog, chainring, or chain replacement.
Additionally, the chain could unexpectedly drop off the gears, or it could get stuck in other parts of the bike and damage parts of your bike as it wedges itself between the crankset and frame, small cog and frame, or large cog and the wheel spokes behind it.
Here’s a helpful article on Bikepush if your chain keeps falling off. It explains in detail the possible causes and how to fix the problem.
Tools you need to adjust the chain tension:
- 15 mm wrench or adjustable wrench
- Hex Wrenches
- Chain Tool
- Master link pliers
Size and adjust Chain Tension On A Bike With Derailleur
On a derailleur-equipped bicycle, the chain should have just enough links to be long enough to shift into the “big-big” combination but also not sag in “small-small.”

Note that for bikes with rear suspension, the chain may sag in “small-small” as the chain often needs to have a few extra links so that the rear triangle can lengthen as the suspension compresses. You need to check your bike’s documentation for correct chain sizing information.
To correctly size a chain, you should do the following steps:
- Wrap the chain around the largest cog in the rear and the largest chainring in the front, and bypass both derailleurs;
- while holding one end against the teeth of the largest chainring, pull the other end of the chain and wrap it around the largest cog on the cassette or freewheel;
- line up the end of the chain against an opposite link (inner and outer links), and then
- add two rivets of chain length.
- Using a chain tool, break the chain at this rivet and attach it using a connecting pin or connecting link.
After correctly routing this length of chain through the derailleurs and connecting the ends, this chain should have adequate tension even in the unusable “small-small” and “big-big” combinations (source).
If there is still sag in the chain, the rear derailleur itself may be damaged and unable to tension it properly, requiring repair or replacement. The spring that pulls the derailleur cage back may be worn out, and this is usually not serviceable, so you need to change it.

Fix Loose Bike Chain On A Single Speed / Fixie / Internal Gear Hub
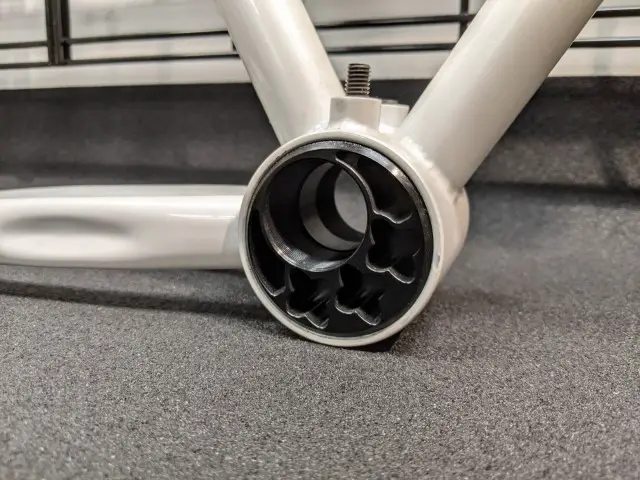
A bike without a derailleur will have an alternative mechanism to tension the chain. It may have horizontal dropouts, sliding dropouts, an eccentric bottom bracket, or a dedicated chain tensioner.
To correctly size the chain, adjust your tensioning mechanism to its “slackest” position (where the chainring and the rear cogs are closest to each other), and follow the same sizing method as in the derailleur drivetrain.
- while holding one end against the teeth of the chainring, pull the other end of the chain and wrap it around the cog;
- line up the end of the chain against an opposite link (inner and outer links), and then
- add two rivets of chain length.
- Using a chain tool, break the chain at this rivet and attach it using a connecting pin or connecting link.
The extra two-chain rivets will allow you to easily remove your rear wheel. Once a correct chain length is installed, the chain must be manually tensioned as there is no derailleur.
For a bike with horizontal dropouts, pull the wheel back and lock the axle nuts in place at a position where the wheel is centered in the frame and the chain is adequately tensioned (you should be able to lift the chain about 1/2 inch upwards at the middle of the chain above the gears).
Some bikes with this dropout style will be equipped with chain tensioners like the Surly Tuggnut. These devices allow for fine-tuning of the chain tension, with the screw sticking out of the back before the axle is secured. If you cannot tension the chain without the axle slipping out of the dropout (rear-facing dropouts) or reaching the end of the dropout (forward-facing dropout), your chain may be too long.
For sliding dropouts, loosen them and slide them back until the chain is adequately tensioned and secure in place, similar to the horizontal dropouts. If you cannot tension the chain without the dropouts sliding to their farthest position, your chain may be too long.
For eccentric bottom bracket systems, rotate both sides of the eccentric bottom bracket until the chain tension is adequate. If you cannot rotate into a position where the chain is adequately tensioned, your chain is too long.

Bikes without horizontal dropouts, sliding dropouts, or eccentric bottom brackets will need another device to tension the chain. Usually, these bikes have standard vertical dropouts designed with derailleur drivetrains in mind.
Chain tensioners such as the Surly Chain Tensioner are available, which attach to the derailleur hanger of the bike frame and function similarly to the cage of a derailleur that applies tension to the chain.
Conclusion
A visit to your local bike shop will always solve your doubts. Still, if you want to do your bike maintenance or you’re just curious whether your chain is tensioned correctly, there’s a lot that you can do yourself, even if you don’t consider yourself a DIY expert.
Happy pedaling!
